oh, and don't mind the bedhead. it's saturday - i haven't actually managed to shower yet today, between the wandering about town and button sewing.
the back:
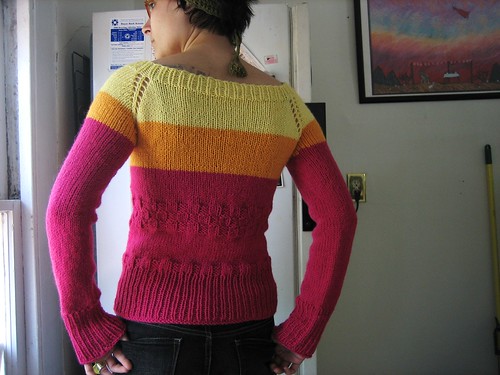
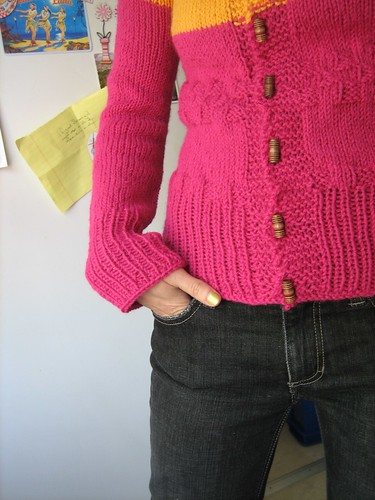
details, details. i got tired of doing nothing but stockinette stitch, so i added a bit of checkerboard knitting, too.
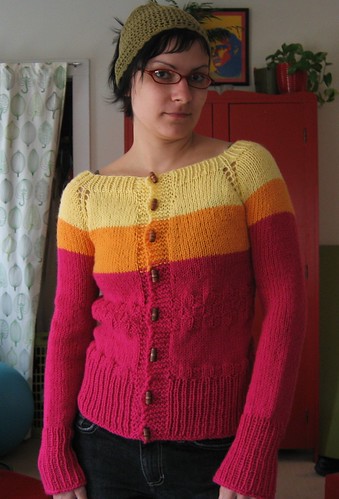
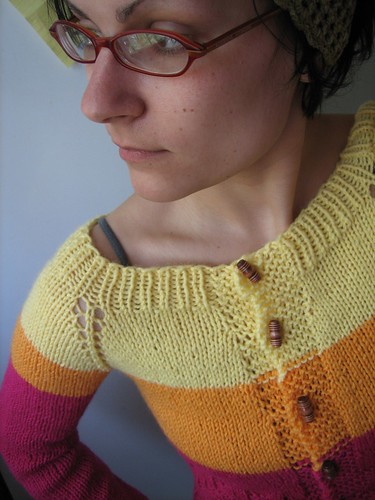
i love the bright, saturated colors i picked. when i first started knitting it up, i thought i'd never wear it due to the extreme brightness. yeah, no... i pretty much love it.
okay, and the pattern. the original pattern is here. here are my edits/updates to make the full-sized version:
Full-Length Version of Anthropologie-Inspired Capelet
Yarn used: Plymouth Encore (worsted)
Quantities: About 1.5 skeins of pink, .5 skein of light yellow, .5 skein of orange
Size: Small/Medium (to fit about 35-36" bust)
US 10, 4 sts=1 inch
Set-Up
CO 100 st. Knit in 1 x 1 rib for 2 inches (or 18 rows) to create neckline. Start buttonholes on second row of ribbing.
Buttonhole Info
RS: On buttonhole rows: On last k6 stitches, k2, k2tog, yo, k2. Repeat buttonhole row every 16 rows.
Raglan Increases: (you will need 4 stitch markers to separate the body into 5 sections: left front, left sleeve, back, right sleeve, right front).
Row 1, RS: Buttonhole row: k6, p12, yo, pm, p1, yo, p14, yo, pm, p1, yo, p32, yo, pm, p1, yo, p14, yo, pm, p1, yo, p12, k6
Row 2 and all WS rows: knit all stitches
Row 3 and all RS rows: k6, *p to next marker, yo, sl marker, p1, yo* repeat from * 3 more times, p until last 6 st, k6.
Continue raglan increases until sleeve measures the circumference of your upper arm. End with a WS row.
Split sleeves and body:
RS: k6, p to 1st marker, move all st from 1st to 2nd marker onto scrap yarn (right sleeve). P to 3rd marker. Move all st from 3rd to 4th marker onto another piece of scrap yarn (left sleeve). P to last 6 st, k6.
WS: Knit all st.
Continue in reverse stockinette stitch.
Continue with buttonholes every 16th row.
Knit until nearly desired length. Switch to 1 x 1 rib for last 4-5 inches. BO all st.
Sleeves:
Pick up all st, one sleeve at a time from scrap yarn. Pick up 4 extra stitches in the underarm. Knit in the round or work back and forth in reverse st st until nearly desired length. Work in 1 x 1 rib for last 4 or 5 inches. BO all st. Seam ribbing on sleeves if not knitted in the round.
i also added a little checkerboard pattern at the bottom of the sweater, just because i got sick of the continuous KNITknitknitknit, PURLpurlpurlpurl. this could be easily modified to make it bigger - just keep doing the raglan increases to make the body and sleeves wider.
6 comments:
hi I saw this on ravelry. I love this sweater. the colors are very happy and I like the checkerboard detail, particulary right above the ribbing. thanks for posting this.
thanks, love! i'm very, very happy with it. i saw those bright saturated colors at the yarn store and pretty much did a 180 from my original plan (which was an olive green version).
I like the sweater very much! lovely colours and combination.
I have the AIC on my Ravelry queue...but I LOVE your mods much more than the original! Thanks for the instructions!
yay, saibh! let me know if you have problems with the pattern at all. i've never tried to explain something like this to someone else (thus, no extra sizes and such, but i think it would be pretty easily modified!).
Post a Comment